Before we delve into the details of this, allow me to answer the question stated above – yes, image optimization definitely matters.
Some people think that images are only for satisfying web visitors visually and ensuring that the content provided isn’t dull. However, there’s actually more to it than what meets the eye and this is what many businessmen using digital marketing in the Philippines fail to see.
The purpose of including images, infographics, or any other visual representations in your website is not just to provide good user experience. The images you provide – especially if it’s optimized for both website speed and SEO – can be a way to gain a higher rank on the Google search page as well as better traffic and lower bounce rates.
If this is what you aim to achieve for your website, then you should definitely learn everything about image optimization.
What is Image Optimization?
For amateur web developers and new SEO practitioners, it’s a common mistake to overlook the importance of image optimization.
Some people believe that as long as the textual content is optimized, everything else will follow. After all, those are just images, right? What really matters is the information on your page. If you have a regular blog site that focuses on textual content, then you might be right. But even if that is the case, I’m sure you still upload graphics on your blog, whether a featured image or a set of pictures that support your content.
To have a mindset that the sole purpose of webpage graphics is for livening up a website or an article alone is wrong. Failure to optimize it can have a big impact on your site’s download time and the bandwidth used by your page visitors.
Why is Image Optimization important?
Notice how everything we do nowadays are quite instantaneous? We have fast food, instant messages, and the internet to give us quick answers to almost every question we have. Nobody likes to wait. If it takes more than 10 seconds for your page to load, your visitors will go someplace else for answers. Selling quality properties on your real estate website, or showing off your photography skills on an online portfolio page? Too bad! The images load so sluggishly that any interested parties will just move on to the next page.
Optimizing your images is one way to prevent high bounce rates.
Another thing about image optimization is the SEO protocol of including alt attributes on the images you upload in your webpage.
People who have insufficient knowledge on SEO would assume that after an image is uploaded on a website their work is already done. If you’re one of these people, allow me to enlighten you on the wonders that an alt attribute can give.
What are Alt Attributes?
Because of image-based search engines like Google, webpages can be found through the graphical content they provide. However, this can only be possible if the images are not missing any alternative attributes.
To help you better understand this, I suggest you watch this short presentation by Matt Cutts.
They say a picture can speak a thousand words. However, this is not the case for Google. As mentioned by Matt in his video above, you don’t have to put every detail on your images’ alt attributes. As long as you include keywords in your description, your page will have a better chance to appear on the SERPs.
There are two aspects to consider when it comes to image optimization:
- Optimizing images for Page Load Speed
- Optimizing images for SEO
Allow me to discuss this further.
Image Optimization for Page Load Speed
JavaScript, HTML, and CSS can greatly contribute to a website’s total file size. However, even if you add all these up, it still won’t compare to the page weight that tons of unoptimized graphics give.
There are a variety of tools you can use for image optimization. In this blog, I’ll share with you three software I highly recommend.
#1 Photoshop
I’m sure everybody is familiar with Photoshop regardless if you know how it works or not.
For people who don’t have sufficient knowledge about image optimization, it’s completely understandable why they see Photoshop as just an image editing software. But there really is more to know about it.
To those who are still blindly crawling their way in figuring out image optimization, allow us to shine some light on the gray areas you face. If you already possess the image editing skills, that’s great! If not, then it will be another topic we can talk about some other time. For now, let’s focus on optimizing those graphical content!
Photoshop has features that enable you to optimize your images. Using it can help you lower the file size of your graphics so that your website’s overall page weight will not be heavier than it can actually be.
How can you do this? It’s actually quite simple.
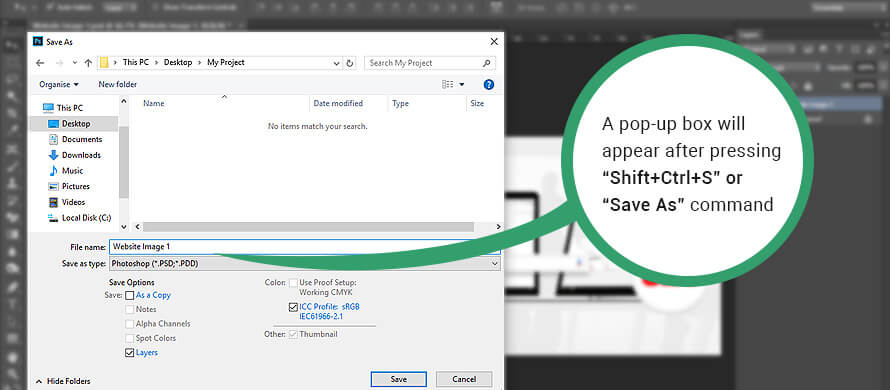
After editing an image, some people automatically press “Shift+Ctrl+S” to save their work. Of course, there’s nothing wrong with that. But if you’re uploading an image on your website, I recommend that you save it in an optimized way. Refer to the image below:

Note that for earlier versions of Adobe Photoshop, you will be able to see the “Save for Web” below the “Save As” option of the File tab.
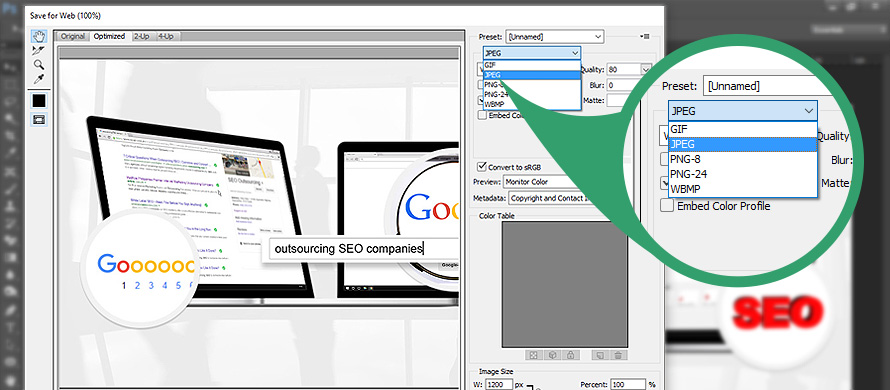
When you select the “save for web” option, you will be able to adjust the file size of your images depending on the quality you settle for. There are different file types you can choose from when saving images on Photoshop.
You must also keep in mind that a few key factors will apply before deciding on a file type to use on an image.
First, you should try to understand that there are two types of compressions when saving an image:
- Lossless – This type of compression makes an image smaller but doesn’t affect its overall quality.
- Lossy – This type of compression affects the quality of an image as it makes it smaller. Saving an image in lossy formats over and over again will progressively worsen the quality of the image.
As seen in the example above, Photoshop allows you to choose between five types of file formats. But in this blog, we’ll be focusing more on GIFs, JPEG and PNG since these are usually the type of formats that are safe to use for web as they don’t cause any layout complications.
GIFs are classified to be lossless compression images. This means that you can also save an image multiple times without losing any of its data. File size is also not that big since it uses a good kind of compression. However, GIFs can only store a maximum of 256 different colors in the file.
This type of image may be animated and can have transparency. It is commonly used for logos and simple images. Plus, it is widely used on the internet.
JPEGs, on the other hand, are lossy images. It can store thousands of colors in its palette which makes it great for photographs. But since it’s classified to be lossy, it doesn’t really work well with logos.
Lastly is the PNG format. In Photoshop, there are two types of PNG formats – PNG-8 and PNG-24. Among the two, what we often use is PNG-24. This file format combines lossless compression that is capable of storing thousands of colors. It has a bigger file size compared to GIFs and JPEGs, but if you have high regards to the quality of your images this may be the best choice.
Let’s assume you choose a JPEG file format. When you select this on Photoshop, an option will appear on the right part of the image. See example below:
It’s completely up to you if you want the image to have either a low or maximum quality.
Don’t forget that as an image quality goes up the file size also gets bigger. And this is something you should take into consideration if you want your website to have a faster loading speed.
Using Photoshop is handy since it’s already an image editing software that optimizes your work for the web. It gives you the advantage of doing your work even when you’re offline. One disadvantage of using this for image optimization is that it can be a bit time consuming since you do the work manually.
#2 Tinypng

The second tool I highly recommend is tinypng. Unlike Photoshop, this online software is only for optimizing images for the web.
It’s very easy to use – you just drag and drop images and leave the rest to the tool. The best thing about tinypng is that it’s completely free. You also don’t have to worry about how your images are going to turn out. The files produced are displayed perfectly on modern browsers as well as on mobile devices.
The only downside? It heavily depends on your internet connection. Since it is an online software, it’s important for you to have a good connection for your work to finish faster. Otherwise, you might as well just resort to offline software like Photoshop and this last one I will recommend.
#3 JPEGmini
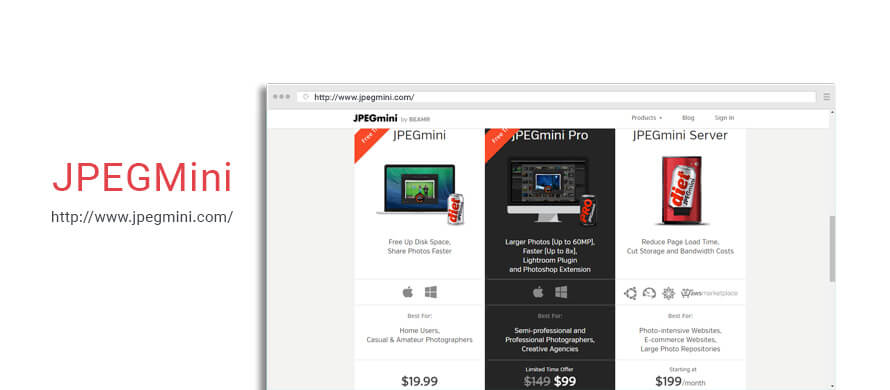
JPEGmini, as compared to Photoshop, is just an image optimizing software similar to tinypng. But unlike tinypng which is an online software, you can get work done on JPEGmini even if you’re offline.
JPEGmini provides you with three downloadable versions – JPEGmini App, JPEGmini Pro, and the JPEGmini server. The JPEGmini Pro is recommended for professional and semi-professional photographers as it has a lightroom plugin and other Photoshop extension services.
On the other hand, the JPEGmini server is an enterprise-class Linux product that is suitable for businesses that stores or delivers large amounts of images like E-Commerce websites. If your page doesn’t fall on these categories then I suggest that you use the JPEGmini desktop application.
The JPEGmini App is easy to use and available for both Windows and Mac. To optimize your images, all you have to do is press the “Choose” button and select the photos you want to optimize. You can also simply drag a folder or group of photos to the app. While the process is being done, you’ll be able to see the amount of disk space you’re able to save.
Note that the three JPEGmini versions mentioned above are all paid tools. However, if you don’t want to spend money on this, you may also opt to try their free web service to optimize your photos using JPEGmini technology. The online application allows you to upload an album that contains a maximum of 1000 images that can be up to 200 MB in size.
Using JPEGmini has a lot of advantages. This includes a bigger amount of images that can be stored in your hard drive as well as on your photo service accounts like Flickr or Dropbox. If you have a webpage that displays large quantities of graphical content, you don’t have to worry about your website having a slow load speed.
Optimizing your images before uploading them on your site can greatly improve the overall user experience that your page provides. Aside from that, it can reduce your storage and bandwidth expenses. Sure, it may take a while to optimize images, but in the long run, anything that takes time to do will give better results than rushed and sloppy efforts.
Optimizing Images for SEO
Moving on to the SEO part of image optimization, there are only two words you need to remember after you have uploaded images in your website or blog: Alternative Attributes.
As intelligent as Google bots are, they still have their limitations and one of it is that they don’t have the capability of distinguishing images on their own. The purpose of alt attributes is not solely for our website visitors, but is also a way to help Google crawlers understand what a website’s graphical content is about.
An image’s alt attribute consists of two parts and these are:
The Alternative text or alt text functions as the textual information that Google bots use to understand the purpose of the graphical content you put on your website. If your images are optimized, web spiders will be able to crawl it together with the textual content.
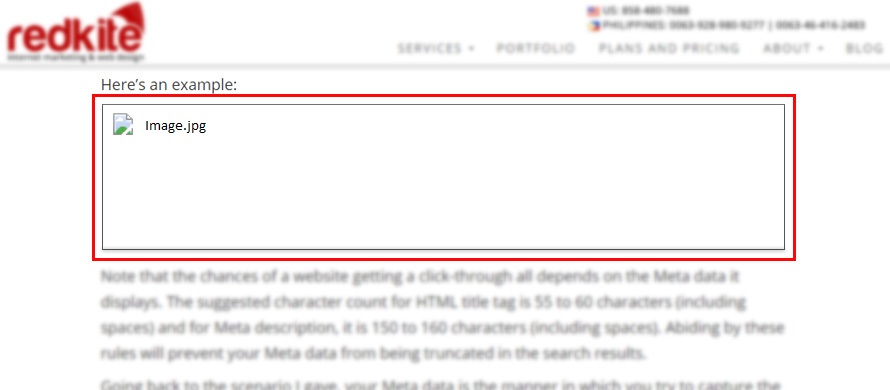
Putting keywords in your images’ alt text is a great strategy to use. By doing this, your graphical content has a higher chance appearing on relevant image-based queries. It also serves as an alternative information for your page visitors if they choose to disable images on their web browsers or if they’re experiencing poor internet connectivity.
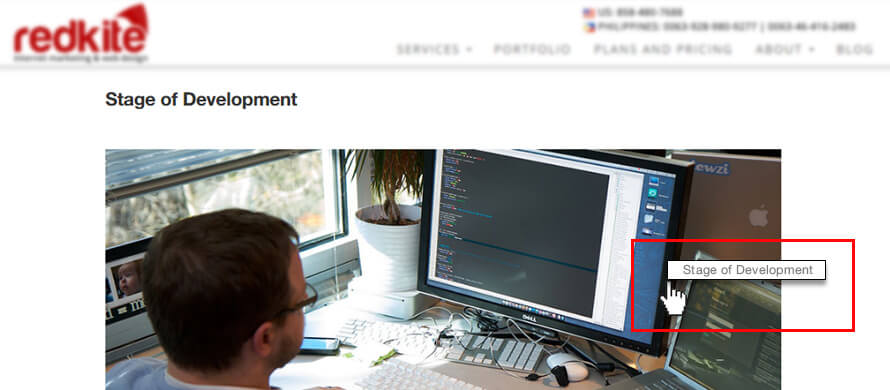
Another part is the image title. Unlike the alt text which serves as an alternative information, an image title functions as additional info. You can see this as you hover the mouse cursor over an image in a website. Similar to regular titles, you should make image titles as concise and catchy as possible.
Basically, alternative attributes are for your page visitors’ benefit, while the alt text specifically stands as a vital aspect for Google bots to crawl the entirety of your page effectively.
Another thing you should remember to do when optimizing images for SEO is to put a relevant File name. It may not seem like a big deal, but it can be a major help to web spiders when they crawl your content. It doesn’t necessarily have to be long, but make sure you are able to describe what an image is about.
Alternative attributes and file names is a great way to provide additional information to your page visitors and web crawlers. It’s simple to do and can give your website great benefits in the long run.
Quality content will go unnoticed if they are not optimized. Textual and graphical content goes hand in hand. Both contribute to the overall success of your website so never take image optimization for granted. The more information you provide for your content, the better it is for your page visitors and web crawlers.