A website can be like a pet. Feels nice to just go to a pet store, point to the most adorable puppy and simply have one. But then you realize the hard-hitting truth – this is more than just fun and games.
A website is serious business.
To make sure that you enjoy the process of preparation and nurturing your new pet i.e. your new site, here are ten steps that are recommended for you before you start the site,what to expect in-between the creation and what to do pre- and post launch.
Step 1: The Purpose of the Site

If you are planning to make a new website or to re-vamp an existing website, even prior to talking to your designer, you ought to be equipped with this information. Thinking of the design right away is very tempting and most people will usually want to dive right in and start discussing the design of the website. But in actuality, the design element should be an intermediate action and not a primary one.
The first thing you need to do is to know why you want the site in the first place. List the reasons, purposes and goals of the site. Do you want to create a portfolio page where potential employers can see your work? Do you plan to establish an online store where clients can transact directly, like with a real estate website or an online marketplace? Some of the reasons may need to be highlighted more than the others.
Here are just a few popular purposes of business websites:
1. Give information to the visitor in a logical way.
Here you will need to think of User-experience | Navigation| Branding.
2. Have the site bring in visitors from search engines.
This is the point where you have to address some technicalities of SEO i.e. Search Engines | Value content | Crawl
3. Be able to filter and/or convert visitors to prospects and eventually leads.
How will you capture and convert your audience?
Newsletters | Sign-ups | Portal | Drip, alerts and Email campaigns
4. Be able to connect the visitors to Social Sites
Ah, social media. Just because everyone is doing it, doesn’t mean you have to as well. However, it’s still an amazing way to get re-visits and to up your branding game. So you may want to think of this at the get-go.
Social Widgets | Icons
5. Usually, it is all of the above.
Useless to say, you may have seen these purposes and elements before in other business websites.
Once you have your own list of what you want your site to do, go forth to the next step: planning and research.
Step 2: Planning and Research

After your vision and purpose for the site is locked down solid – and you are absolutely sure that this is what you and your customers want – then you will need to pull up a plan on how to get the site started.
Answer these questions: What will be on the site and how will it be arranged?
Here are some ways on how to plan the website:
- Start a Google Keyword Planner research to see what kind of search queries you can supply value to. Spot your niche market keywords.
- Build a sitemap that makes sense to the user and the search engines. The sitemap acts like a wireframe of how all your pages will be related to each other. It’s also useful in terms of determining how your navigation menu would look like.
- Do your research! Take a look at websites that are modern and those that would perfectly fit your niche. This is for you to learn about emerging design trends, site widgets, and branding ideas which would better help you come up with your site layout and content design.
- This is also the time you want to start collecting all the assets you need for the site e.g. text, images, videos and other media.
Now, you are almost ready to talk to a designer, go over your ideas and get price quotations and time projections.
Step 3: Reality Check

Going overboard, are we? Or underestimating what is needed?
If you think the site won’t need much elaborate designing and functional programming, you can choose from these options:
Template or Custom
Template sites such as SquareSpace, are “pre-made” web design layouts that you can either purchase or get for free. The thing about template sites is that they look like “templates.” They do not look custom or bespoke.
You can choose this if you want to bring costs drastically down. If you don’t really need much customization, templated sites can still work for your purpose.
At this point you will need to get a reality check. Ask yourself if this template is getting in the way of your purpose of having the site.
If yes, then go for custom.
Usually the reason why people go custom is due to branding and how they want to guide the visitors around the site. Also most templates may still need some customization such as form fields, widgets, etc.
Custom sites are the best choice in terms of creativity and effectiveness. But for those with a small budget in mind, starting with a template and then working towards a custom site in a few months or years is not unheard of.
Step 4: Finding your Designer/Developer

Great, your blue print is ready and now you want to partner with a developer on how to get your project started. But who do you want to work with?
Designing and developing a site is pretty much like building a house. You have the regular, standard priced coders and you have those who are experts. And, of course, the specialists cost more. It’s the Toyotas vs the Mercedes, McDonald’s vs that amazing family owned restaurant everyone loves that has lasted a hundred or so years.
At this point, you will need to understand how you want the site done. Is it going to be just another regular site or something more elaborate?
Sit down for a moment, meditate on this and when you have your answer, you will know what to do. Right after that, have the right paperwork and contract you want from your developer of choice.
Step 5: The Journey
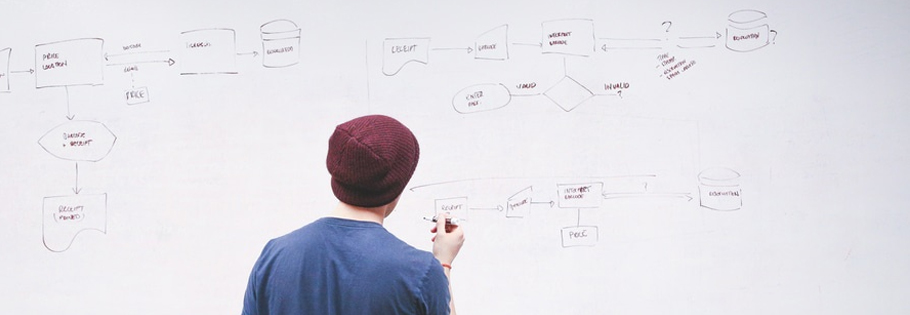
Wireframes, layouts and coding
Template websites are pre-made and as a result, you cannot mess around much with their sitemap. In fact, you have to weave yourself around the template. You can customize a few things but you cannot really “think-out-of-the-box” on this one.
For custom sites, wireframes are the foundations on how you want to carve your site. They look like boxes stacked on each other to represent what elements will be present on the site pages.
Wireframes allow the designer and the client to have a basic sketch representation on what will come next i.e. the layout.
Layouts these days are made to serve two purposes:
- To be able to connect the viewer to the site
- For the site to work perfectly with computers, mobile devices and browsers. Responsive sites that can easily handle content for all types of screens are preferred by search engines.
The best option is to ask your designer to make your layout in a few preferred color themes or palettes. This allows the client to see which particular palette will suit the site more.
After the layout is ready, it is then sent for coding.
Coders interpret the artwork and design into HTML and other scripts that browsers can understand.
Step 6: Quality Check

When the coding is complete, the site is placed on a staging site to be displayed to the client i.e. you. Usually before the client visualizes the site, a complete quality analysis is made.
This process is done to make sure that the website is rendered correctly on all major browsers e.g. Chrome, Safari, Microsoft Edge, Internet Explorer and Opera.
The same goes for operating systems such as Microsoft and Apple iOS as well.
If the site is responsive, then all major mobile devices are also used to run this check such as iPhones, Android devices and tablets.
Step 7: Server-Side Administration

Your developer or webmaster usually performs this duty of connecting your domain to your preferred server for website hosting and email hosting.
The time taken for the domain and the server to merge with each other internationally across all IPs can take anywhere between 24-72 hours. This is called migration.
So if your site has a massive “cannot-miss” launch deadline, do not forget this part. It can literally be a nightmare which could have been avoided in the first place.
Step 8: Launch Preparation

The usual routine here is to have a “Curtain Image” on your domain which says things like “Welcome to My Site! We will be up and running shortly. Please revisit us at 12 noon EST.” or whatever you prefer.
Once the site is up and it gets read by search engines, make sure that prior to your launch, you’ve already checked your internal links, external links, possible page duplications, meta-tags and other SEO matters.
Also, check if your social media URLs are correct and that you have social media activity in the icons you’ve placed on your site.
Step 9: The Launch

Because of the time taken for the server and domain to acknowledge each other, some people may see the new site and some may not. Don’t panic though, as this is a common occurrence. The complete time taken for the site to work normally is 72 hours after the migration.
This is the exciting part. Have some coffee, check your some social media, nibble on some snacks and before you know it… your site is live!
Step 10: Performance Analysis and Adjustments

With the use of Google Analytics and search console, you can measure the quality and quantity of your site’s traffic. Look into it every month or hire someone who can do it for you and consult ways to make things better.
For me, I do a performance analysis almost daily. It’s a good habit to get into.
Do not stop till your site has been able to deliver its initial purpose. Keep working at it with your team. It’s never easy – but it is doable as long as you are armed with a lot of persistence and perseverance.
When you get to that place or you feel you are already nearing it, let us know if this blog helped you in any way. And don’t forget to share this with your friends or your team or anyone who’s slightly interested in digital marketing in the Philippines!